Hi all,
I’d like to share some images from one of my workshops on Classic Glamour Photography at Paul’s Photo in Torrance. We had an especially good workshop with a wonderful model, Heather Lynn Mayer – we had a blast! I want to share with you the post process I went through with this most recent workshop and introduce a technique for creating custom backdrops in Photoshop using custom brushes.
Lets start with this base file right out of ACR/Lightroom…
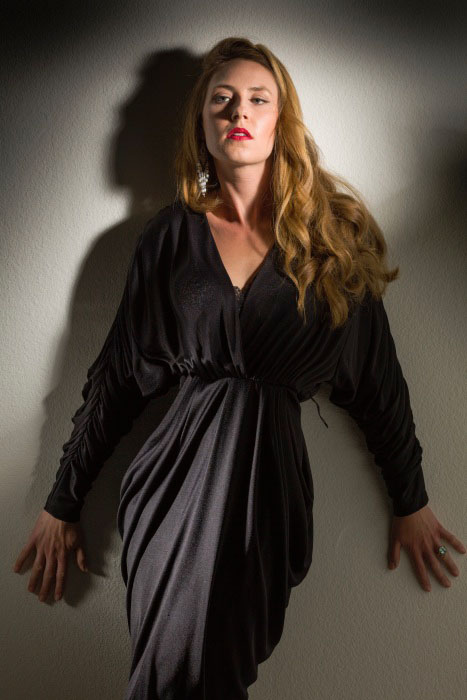
Here is the original image capture with basic Lightroom enhancements
I did the usual Lightroom enhancements plus a little post crop vignetting and graduated filter application to darken edges and enhance the existing lighting vignette. Next up some Channel Mixer B+W with a 60-40 blend of red to green channels…
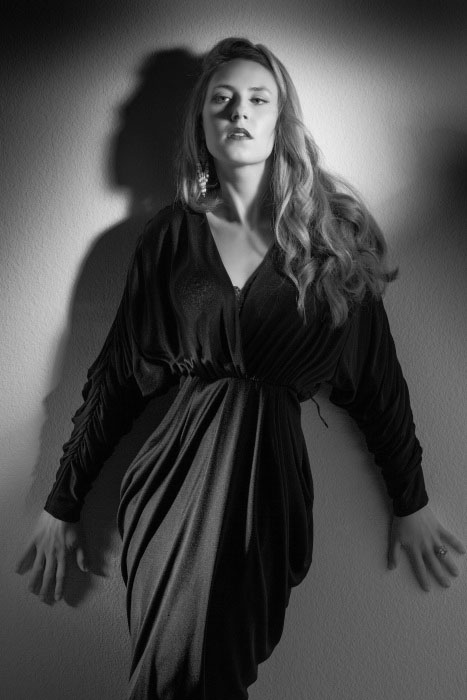
Here a fairly straightforward B+W conversion using the Channel Mixer in Photoshop
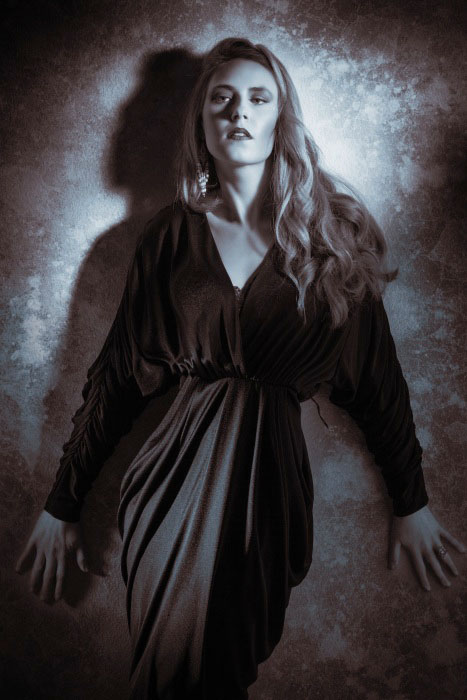
I was going for a 40’s glamour look in the style of George Hurrell. I used a gridspot on a Norman flash as a key light from the upper right with another gridspot raking across her torso from the lower left… After some basic retouching to smooth out the skin, I added some more shape using the blue channel, masked into her face…
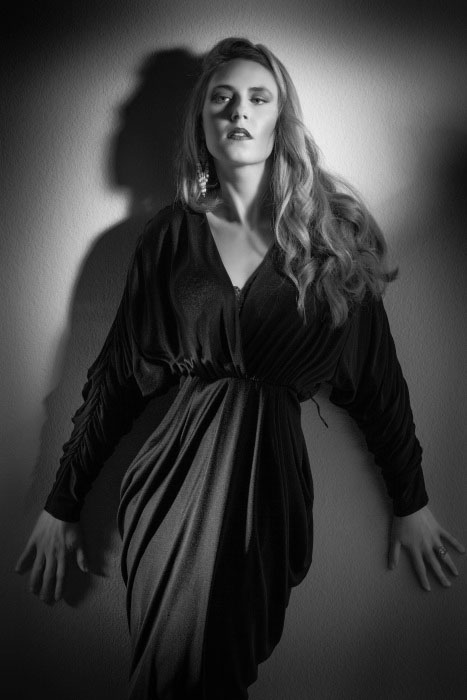
A little skin smoothing and an application of the blue channel darkness masked in to shadow the eyes lips and cheeks
Adding shading this way, using the blue channel B&W, is different than simply dodging and burning because there is more inherent local contrast in the blue channel, as well as darker skin. Very often, I will combine this with a little bit of dodging and burning using a softlight layer to sculpt the features more. Now its time to work up a custom background…
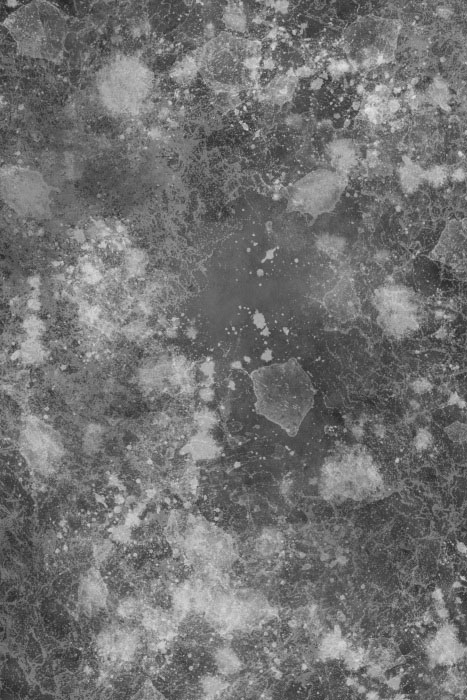
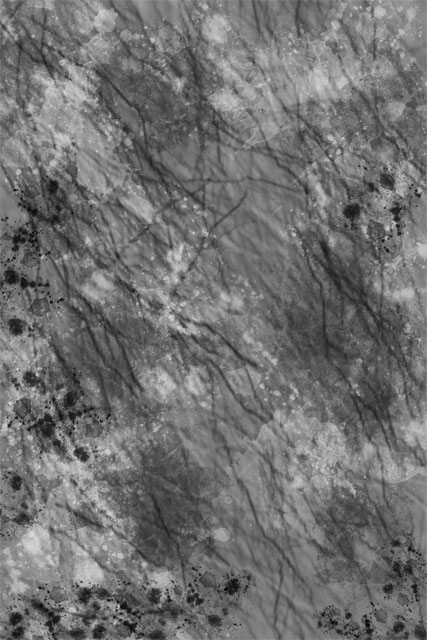
This background was created on a layer above everything else by successive applications of different custom brush shapes.
I have a collection of custom brushes I’ve found, available for free on various websites ( see resource links at the end) It is a lot of fun, and very fast, to build a custom background by overlapping various brush strokes and dabbing with brush shapes that create texture or splashes—some of my favorites are “blood splatters”—you can build them up in layers for more control, but I usually just start painting away freestyle until I have something that looks cool…
The Texture “layer” is applied in Overlay Blend mode to integrate with the underlying image.
Once the background layer is finished I change the layer blend mode from normal to “Overlay” – the texture then blends in with the underlying image. From this point it is only a matter of masking it off the figure by painting black with a soft edge brush in the layer mask for the texture layer…
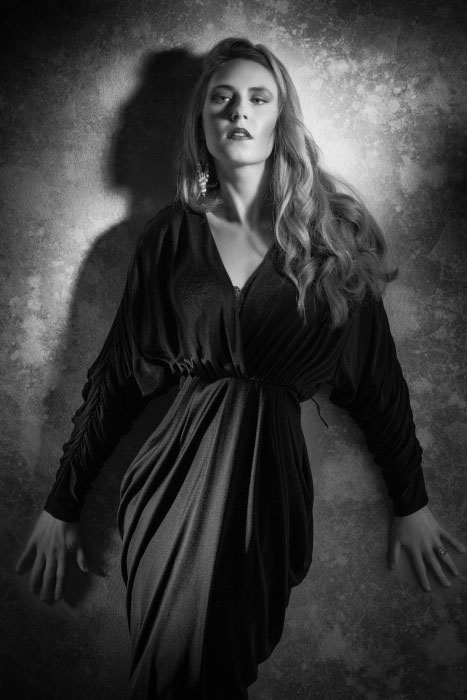
Here the texture has been masked off the figure and opacity reduced to 63%
I usually reduce the opacity somewhat so that the texture doesn’t overpower the figure. Next, a little subtle split tone effect…
I love applying a cool-warm split tone effect to enhance the tonal contrast with a little color contrast.
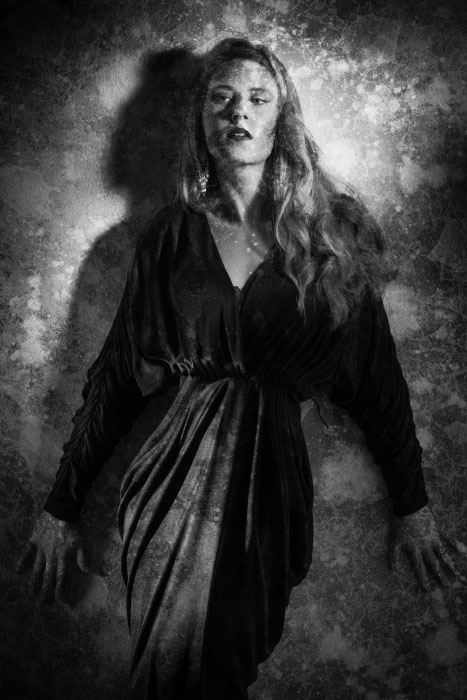
I use multiple Hue/Saturation layers to achieve a split tone effect and sometimes mask different “split-levels” to bring out subtle details – the folds of the dress are emphasized with a separate “split” than the rest of the image. You can see a detailed video step-by-step of this technique as part of my Classic Hollywood Glamour post… The final step is to work back some of the original color into the image…
Here the original color image is blended back into the split tone B&W in the face and hands.
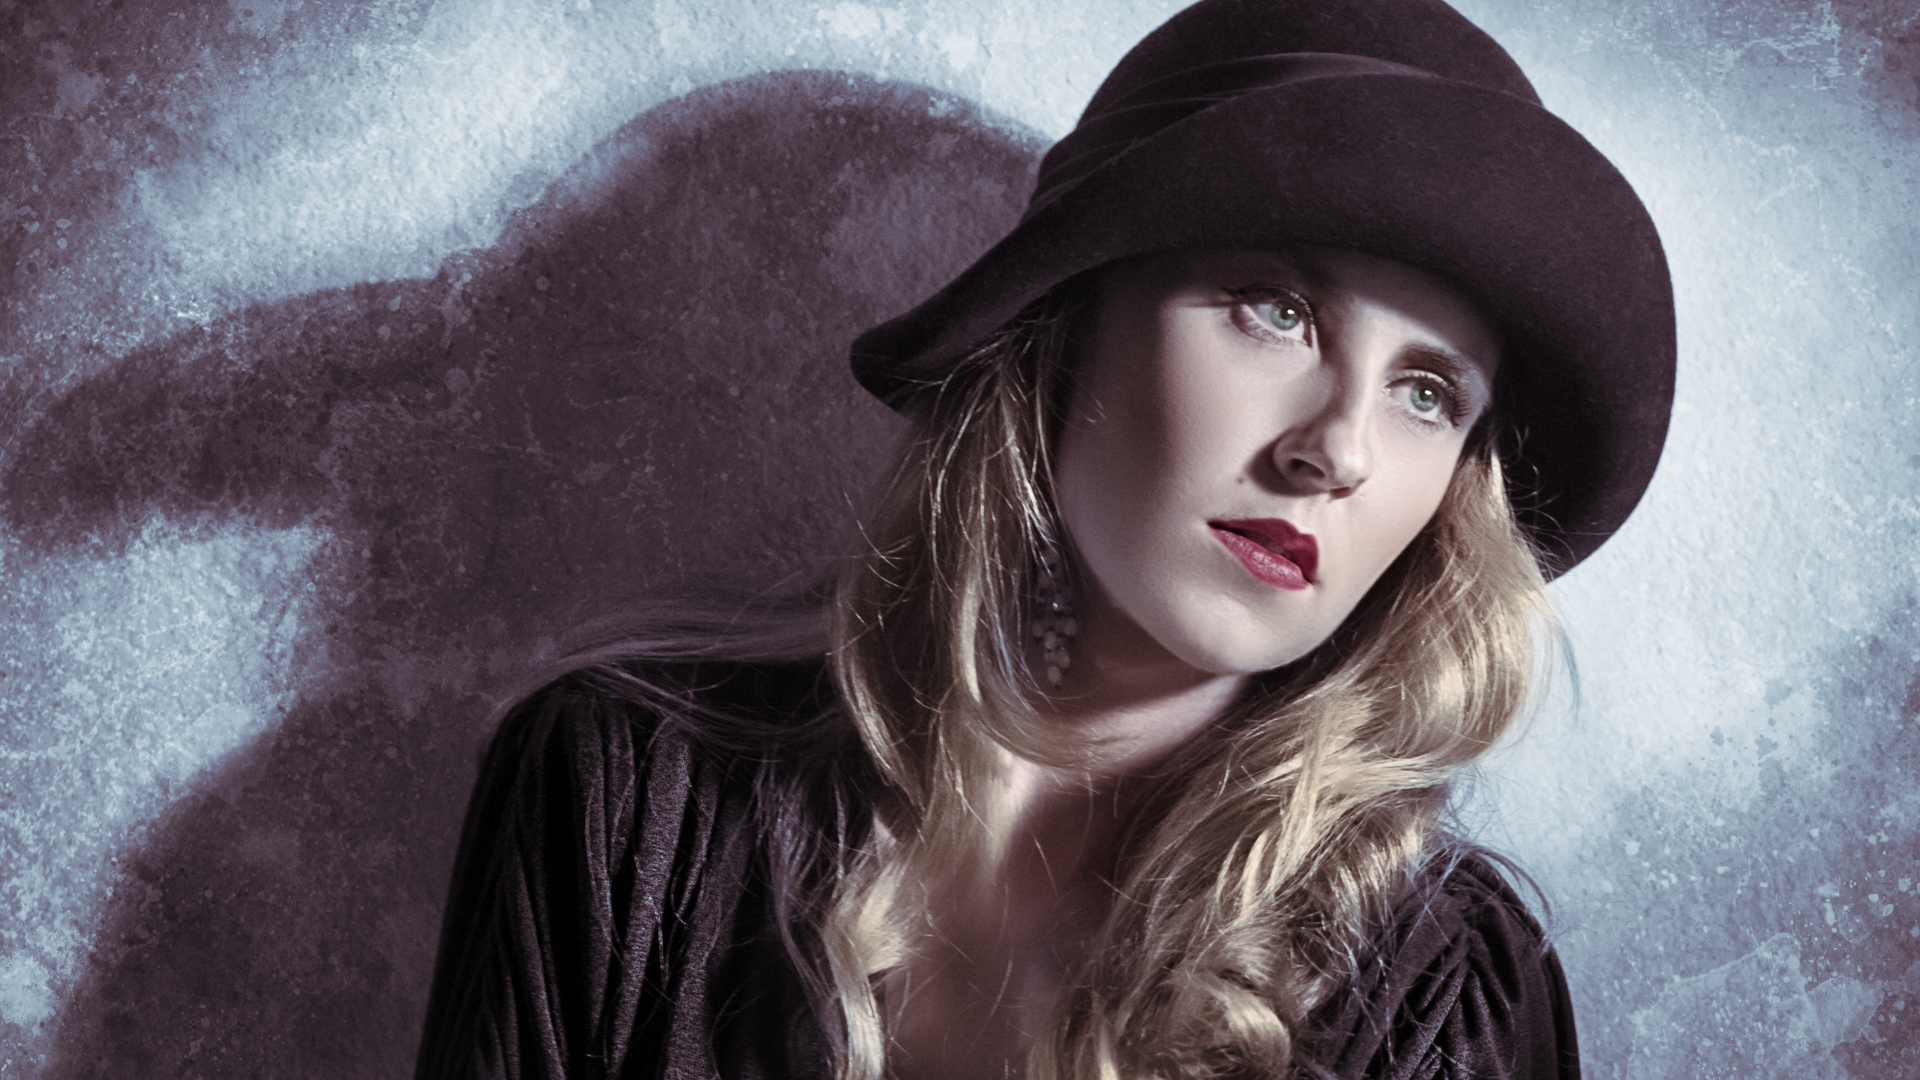
I duplicated the background layer and brought it up to the top of the layer stack, set the blend mode to “Color,” reduced the opacity and masked it off everything but the face and hands. The final result has a kind of hand colored look with a richly textured background. You never have to settle for a plain background again!
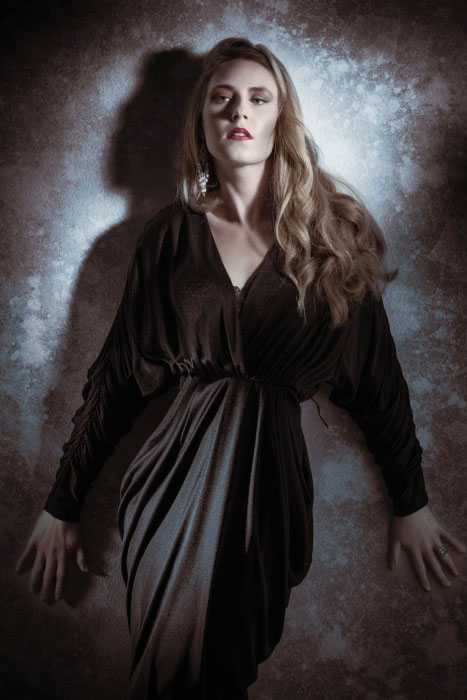
Here are a couple of other examples with the painted background layer and its final application in the image…
The result of different brushes overlapped with different apply modes…
The resulting image composite!
The beauty of this approach is that you can always have a unique background without having to rent a painted muslin backdrop, hang it or light it.

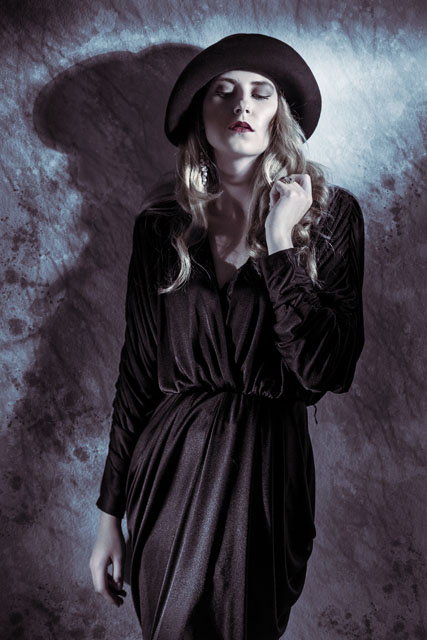
Another quickly painted background.
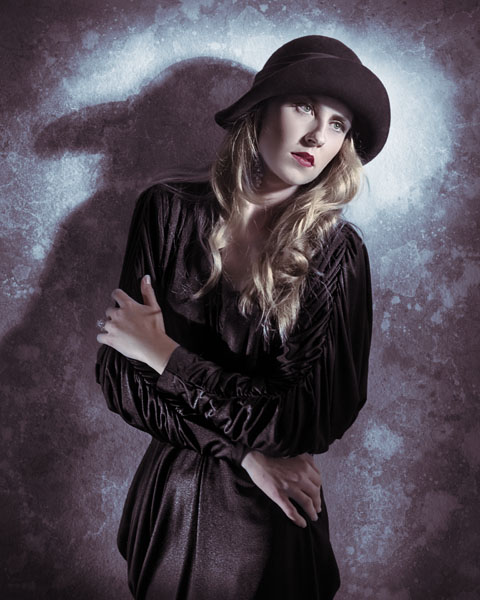
The final image with the painted background.
You can find custom brushes very easily with a simple Google search – deviantART is a great resource for custom brushes of all kinds- here are a few of my favorites:
Hair Brushes: Nagel Series 12 Brushes
Old Paper Brushes
Foliage Brushes
Grunge Brushes
Abstract Brush Set
Lightning Brushes
Cracks
Brushes have to be installed and activated inside Photoshop to be made available for use! You can load them from the brush menu- they can be stored anywhere but usually you would place them in the Presets folder inside the application folder – here is a link to an article explaining how to do that: http://www.obsidiandawn.com/installing-photoshop-brushes-gimp-tutorial – & Adobe’s official directions
Bobbi Lane and I will be doing a workshop in Los Angeles at the Los Angeles Center for Photography on “Hollywood Lighting in the Hurrell Style,” March 9th, 10th & 11th, 2018, where I will be covering retouching techniques like this one, as well as many others. If you are in the LA area, and would like a more personal lesson in Glamour lighting and retouching retouching – register for our workshop here.